|
3.5.0-rc1
|
|
3.5.0-rc1
|
In this tutorial, we will present how to create an aircraft from scratch.
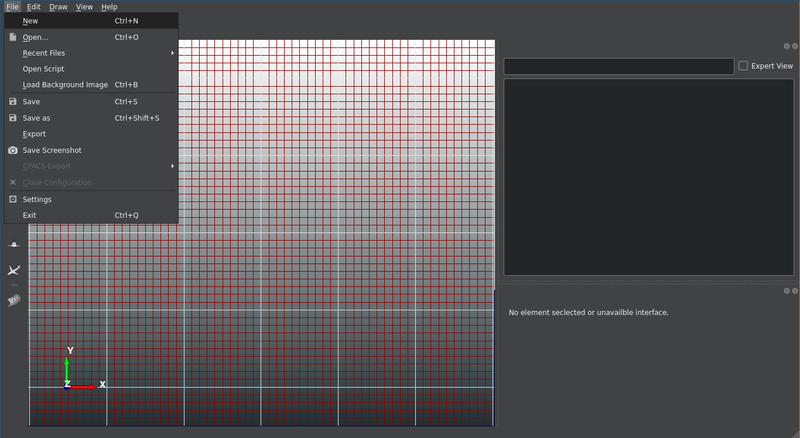
1 ) Open TiGLCreator.
2 ) Create a new file, either click on create a new file (File->New) or press the shortcut Ctl+N.
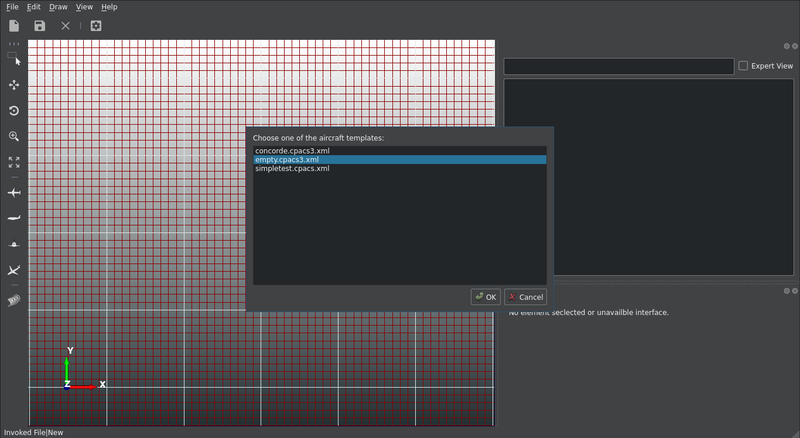
3 ) In the dialog box, choose one of the template files, then click on "OK".
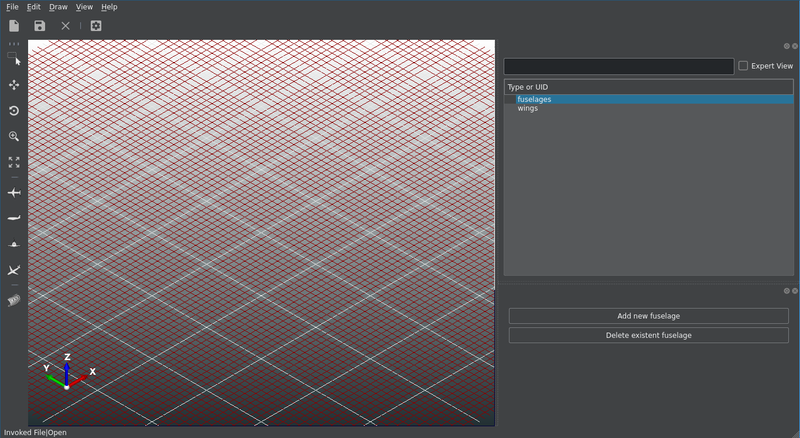
4 ) Select the fuselages element in the CPACS tree view. If the CPACS tree view is not shown, either activate the view trough the menu (View->Display->Tree) or press the shortcut alt+M.
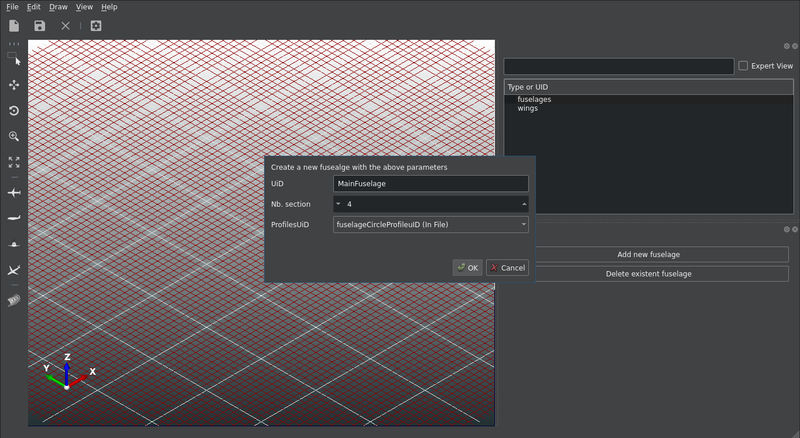
5 ) Click on "Add a new fuselage" in the Editor widget. If the editor widget is not shown, either activate the widget through the menu (View->Display->Editor) or enter the shortcut alt+Shift+M.
6 ) In the dialog box, choose the UID for this fuselage, the number of section and the profile UIDs, then click on "OK". It is important to give the correct UID at this point, because, for the moment, it is impossible to change UID later on. Observe, that the other UIDs such as section UIDs or the transformation UIDs are automatically generated and derived from this given UID.
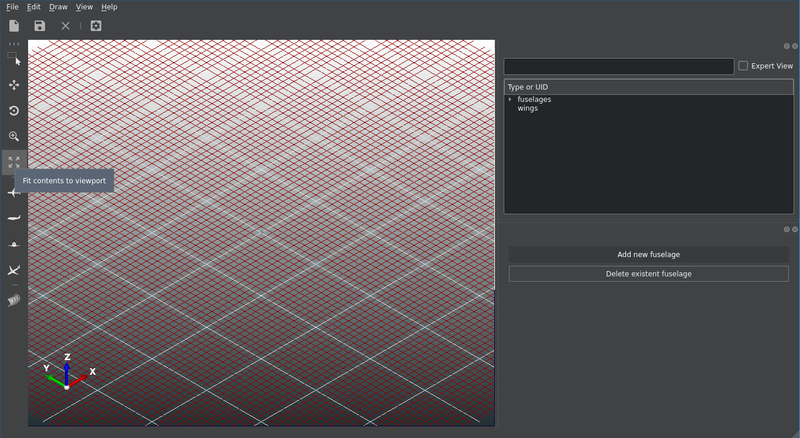
7 ) Click on the button to fit the content on the view port or enter the shortcut Alt+A, because you are probably to far away from the fuselage.
8 ) In the CPACS tree view, click on the fuselage that you have just created (here "MainFuselage") to activate its editor widget.
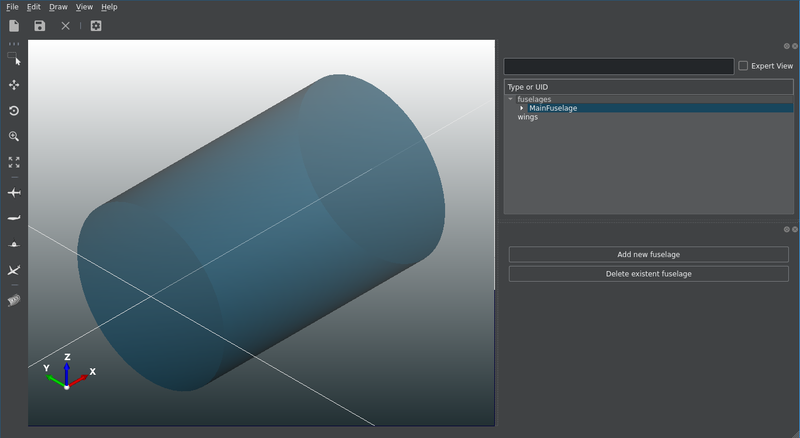
9 ) Now you should have the editor widget displaying the high-level parameters for the fuselage and the fuselage sections highlighted in the scene.
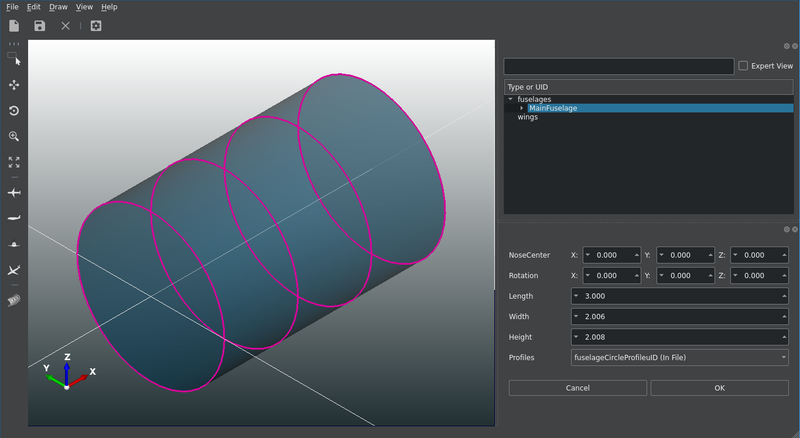
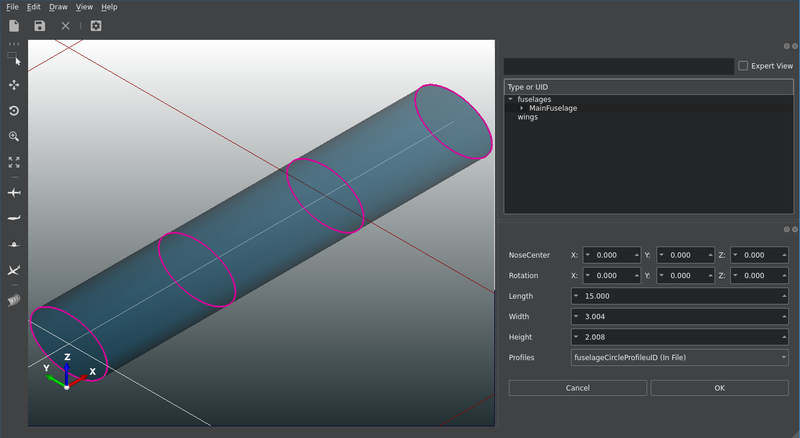
10 ) Edit some parameters of the fuselage. Here, I change the length to 15 and the width to 3, then click on "OK". Remark, that the change are only applied when you click on "OK". The apply order is from top parameter to bottom parameter. If you have made a mistake and you want the values of your current tigl object to be restored, you can click on "Cancel".
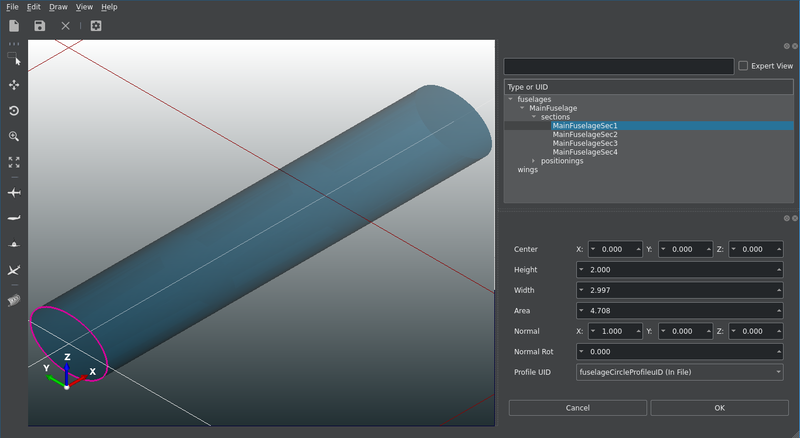
11 ) Now, if you want to go in a more fine-grained definition, you need to switch to the section level. To do so, select the wanted section in the CPACS tree view and click on it. The editor widget should change to the section editor and only the selected section should be highlighted. Here, I chose the first section.
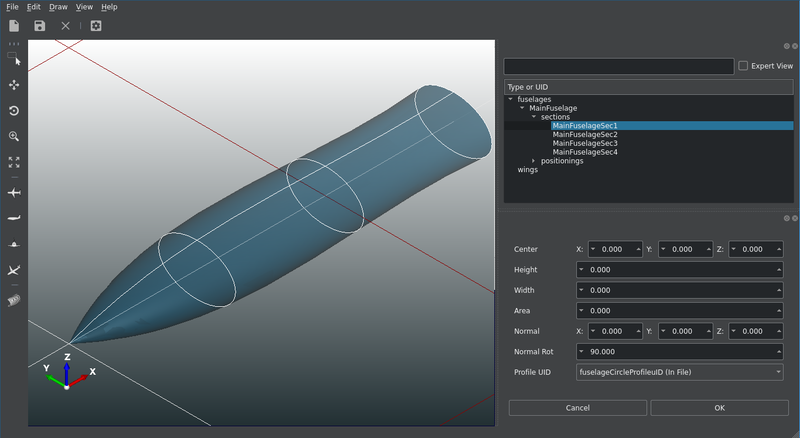
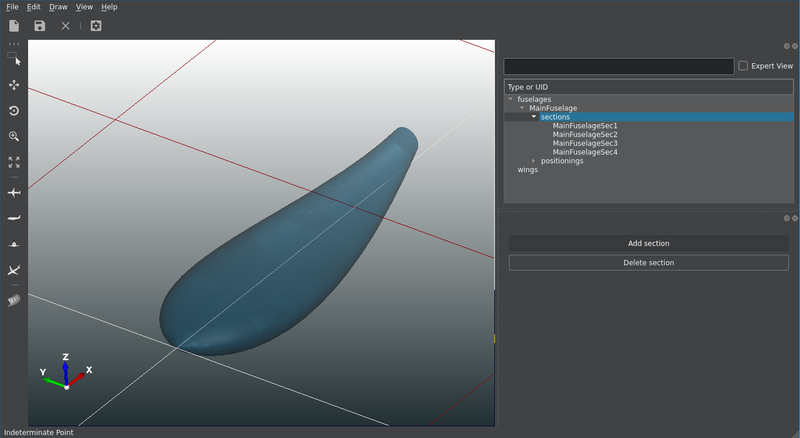
12 ) Edit the high-level parameters of the section. Here, I changed the area to zero to have a peaked nose.
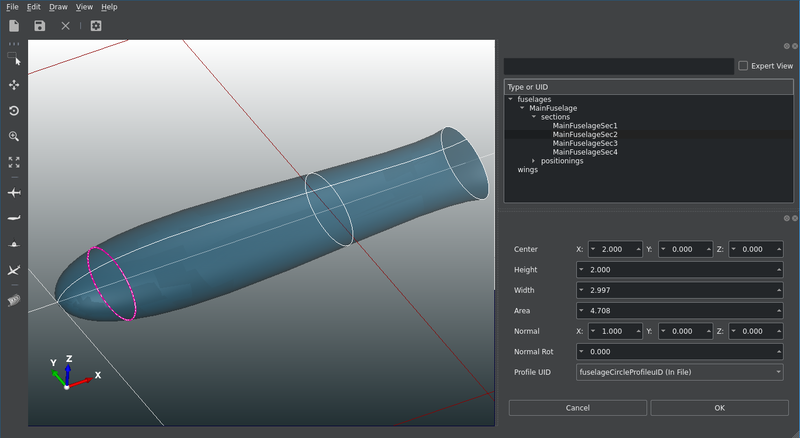
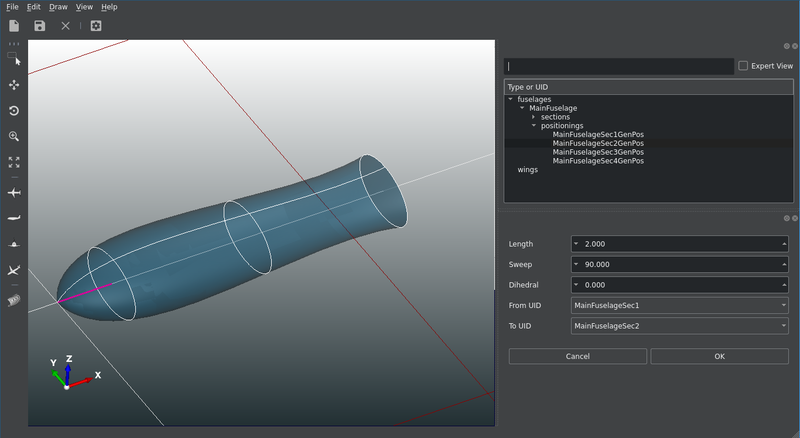
13 ) Do the same for the other sections, if you want. To set the position of a section you can also use the positioning editor. Remark the difference between setting the position using the section editor and setting the position using the positioning editor. In the case of using the section editor, only the selected section changed and in the case of using the positioning widget, the section after the selected section was shifted. This comes from the fact that the positionings depend on each other.
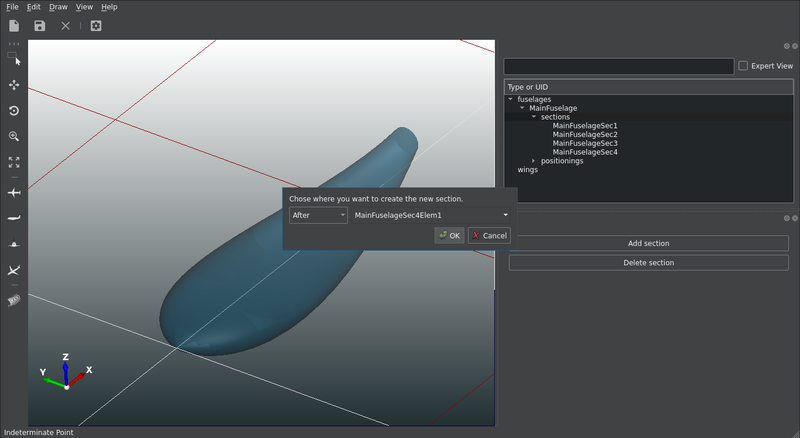
14 ) If you want to add a section, you can go to the sections level by click on "sections" in the tree view and then click on "Add section". Here, I add a section after the last one. Remark that the position and the size of the added section is defined by the other sections already present in the fuselage.
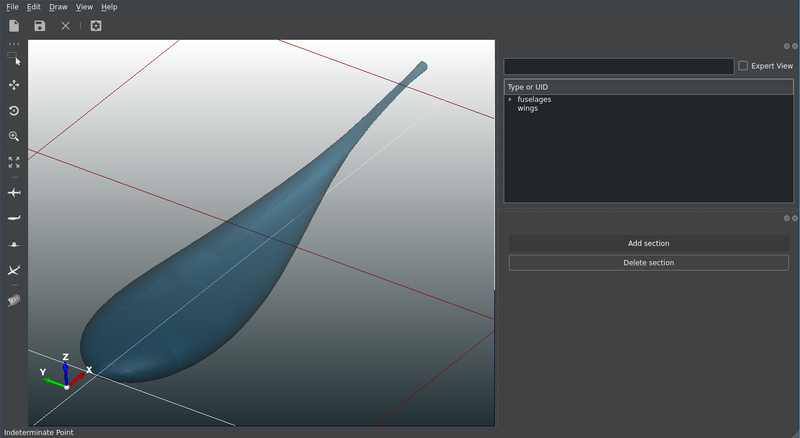
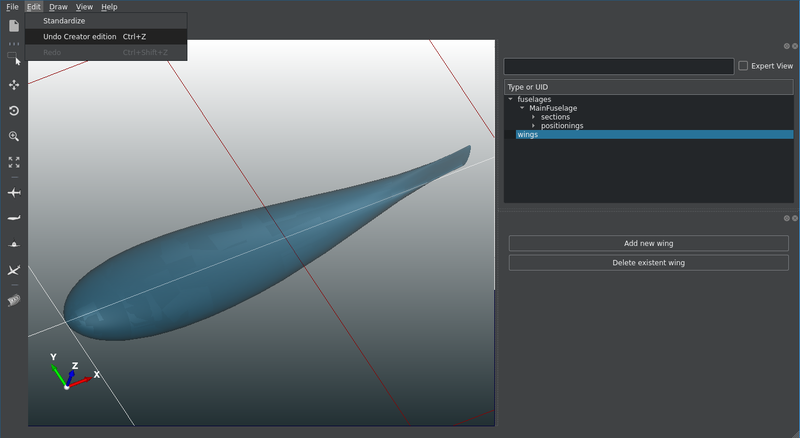
15 ) Modify the fuselage as you want by the selecting the object to modify in the tree view and edit in the editor widget. If you have made some unwanted operation you can always undo the previous operation by pressing the shortcut Ctl+Z if the focus is in the scene or by clicking on the undo button (Edit->Undo)
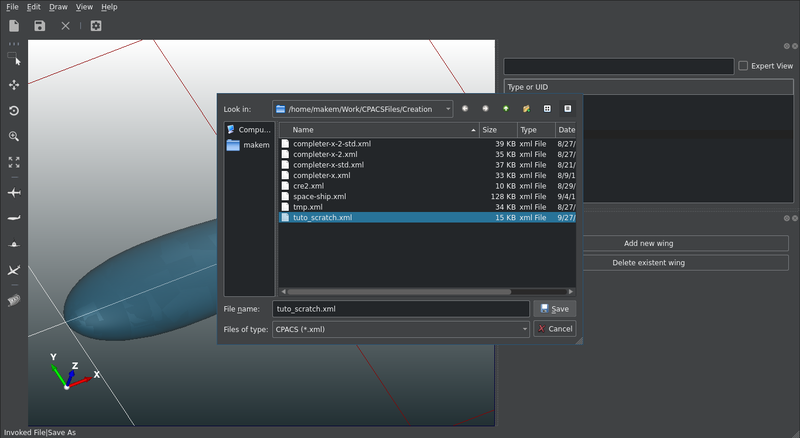
16 ) Once you are happy with your fuselage or when you want to add a check point, you can save your file. Click on (File->Save) or press the short Ctl+S. Make sure to add .xml to the file name otherwise an error will rise. Remark, before this operation the file is not saved. There is no auto-saving feature.
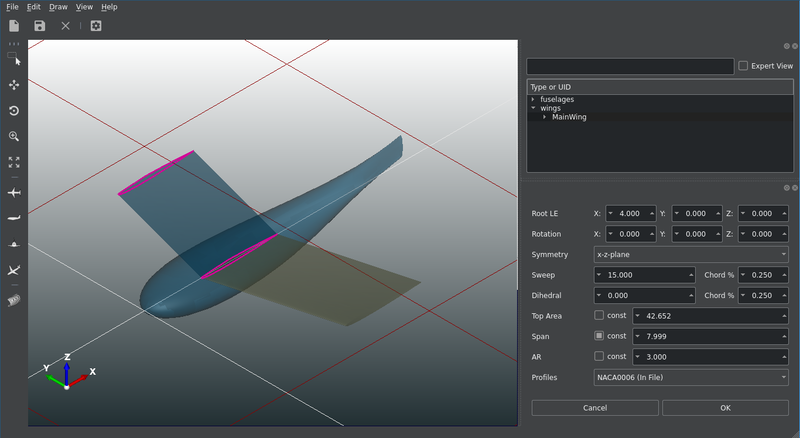
17 ) The creation of the wing is basically the same as the creation of a fuselage. First, add a new wing.

18 ) Edit the wing parameters.
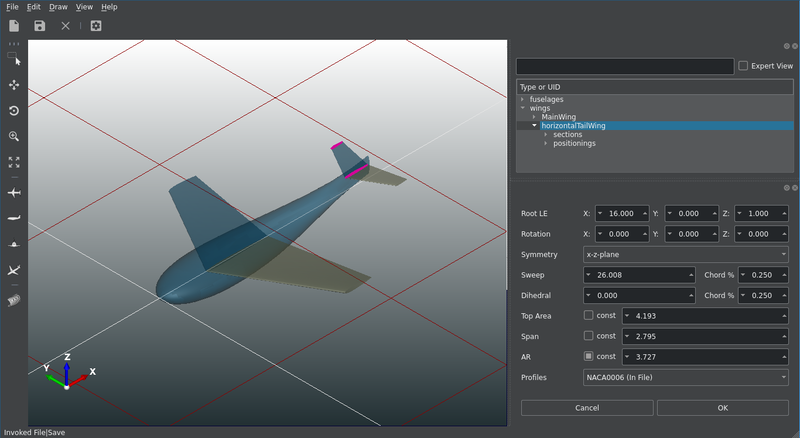
19 ) Go in more fine-grained definition.

20 ) You can of course create multiple wings.
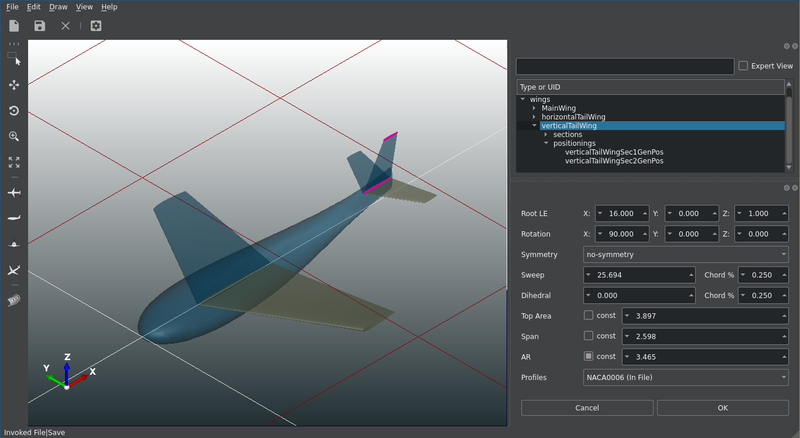
21 ) If you want to create a vertical wing, you can simply set the X-rotation to 90 degrees. Remark that the sweep, dihedral and other definitions still make also sense in this case.
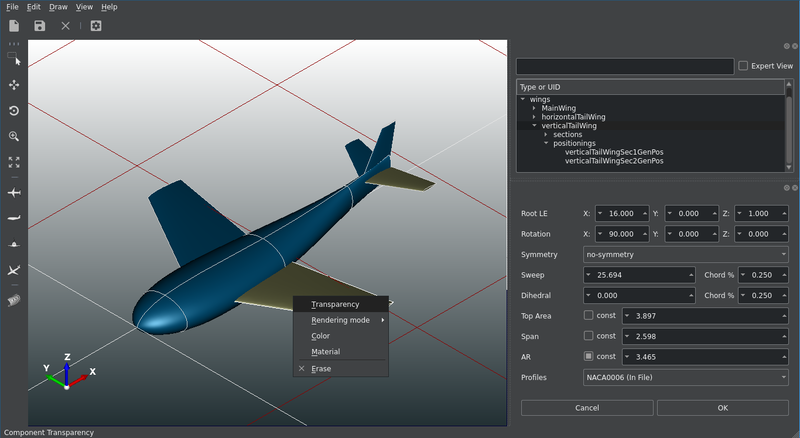
22 ) You can change the transparency of the displayed element by selecting the element and right clicking on it.
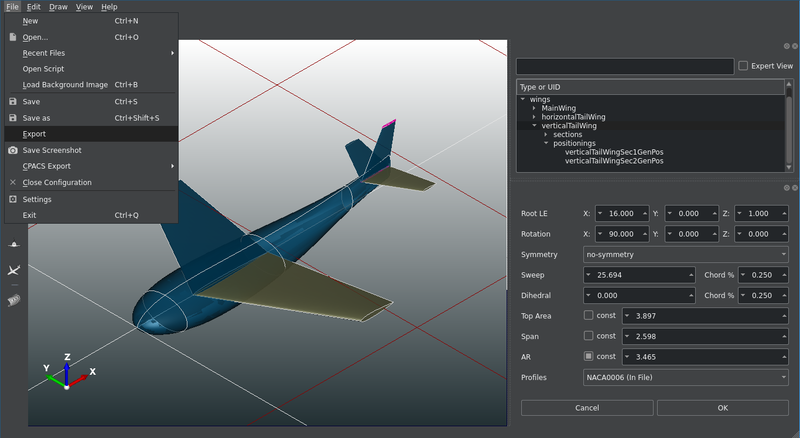
23 ) You can also export your geometry to other formats.
24 ) :)
See the section Python-Demo and take a look at the example file create_space_ship.py that explains the mechanism of the internal python api quite well.